
Check out this simple fine motor activity using construction paper. It’s an easy, low cost art project for kids. Improve fine motor skills such as hand-eye coordination, pencil grasp development, hand strength, in-hand manipulation skills, visual perceptual skills, and creativity!
I don’t like to waste. In my office closet and cabinets, I have several bins of items that most people would throw out.
But I don’t throw them out. As a pediatric occupational therapist, I value the empty containers, random small toys, and scraps of paper!
My philosophy is that my collected items will eventually find a use for something. Or someone.
And they always do!
When students make a project, I even save the scraps! We find a way to re-use them in another fine motor activity.
This post is an example of how to creatively use the scraps! Recycle. Reuse.
Improve Fine Motor Skills Using Scraps of Construction Paper With This Simple Fine Motor Activity
Tearing construction paper is a great activity for preschool and kindergarten students’ little hands. It’s a perfect pre-cutting activity that works on pincer grasp, skill finger development, building hand muscles, and improving bilateral coordination.
The fingers that are involved in tearing are called the skill fingers: the thumb, index, and middle fingers. They are what occupational therapists like to call the working fingers. They do all of the work to grasp and manipulate items. The other two fingers curl into the palm for stabilization.
Tearing paper also encourages bilateral integration. Each hand coordinates working together to complete a task. (Click the link for more bilateral coordination activities.)
Even though this fine motor activities is perfect for young kids, I’ve used it with many older students beyond kindergarten!
It’s a fun way to continue to work on grasp development, fine motor strength, and in-hand manipulation skills.
Additionally, when students are encouraged to create their own pictures, it helps improve visual perceptual skills such as visual imagery, visual discrimination, visual attention, and spatial relations.
Older children find that tearing the paper can be relaxing. So a simple project like this can serve as a mindful brain break for kids!
And more importantly, using scraps of paper to make an art project works on creativity!
Kids (and adults) sometimes become reliant on using templates and patterns. The focus tends to be on a perfect looking end product. One that looks similar to everyone else’s.
Using scraps of construction paper creates abstract, unique designs. It’s the texture from the paper art that I personally love!
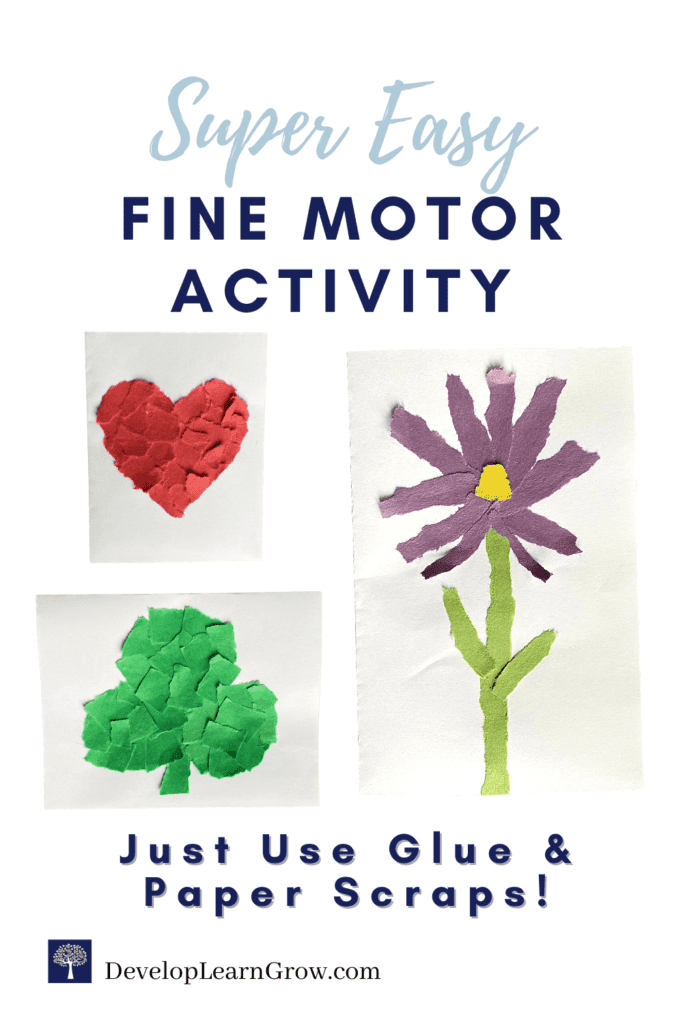
Simple Fine Motor Activity – Tearing Construction Paper Scraps to Create Unique Designs
For this simple art project, for each student, you need a plain piece of paper, a glue stick, and construction paper scraps. No scissors are needed!
Designs can be as simple as filling in an outline of a letter, number, or shape for young kids. Older children can create a seasonal picture.
Encourage students to create their picture without an outline behind it. If they feel they’d prefer one, have them draw it using simple shapes and lines. Or provide them with a template.
First, have your students create an outline if they wish to have one.
Then, choose colors construction paper scraps to use. Tear into desired sizes and shapes.
The goal is creating texture on the edges of the paper during tearing. Grading of movements are needed for tearing various sizes of scraps.
For smaller details or for tearing long thin strips of paper, more precise finger movements are needed with a pincer grasp. The fingers need to shift the paper while also gently separating it.
Next, use the glue stick directly on the large plain paper for background pictures or larger parts of the picture.
When gluing small pieces or thin strips, it’s sometimes easier to pick up each piece and slide it over the top of the glue stick before placing it on the paper.
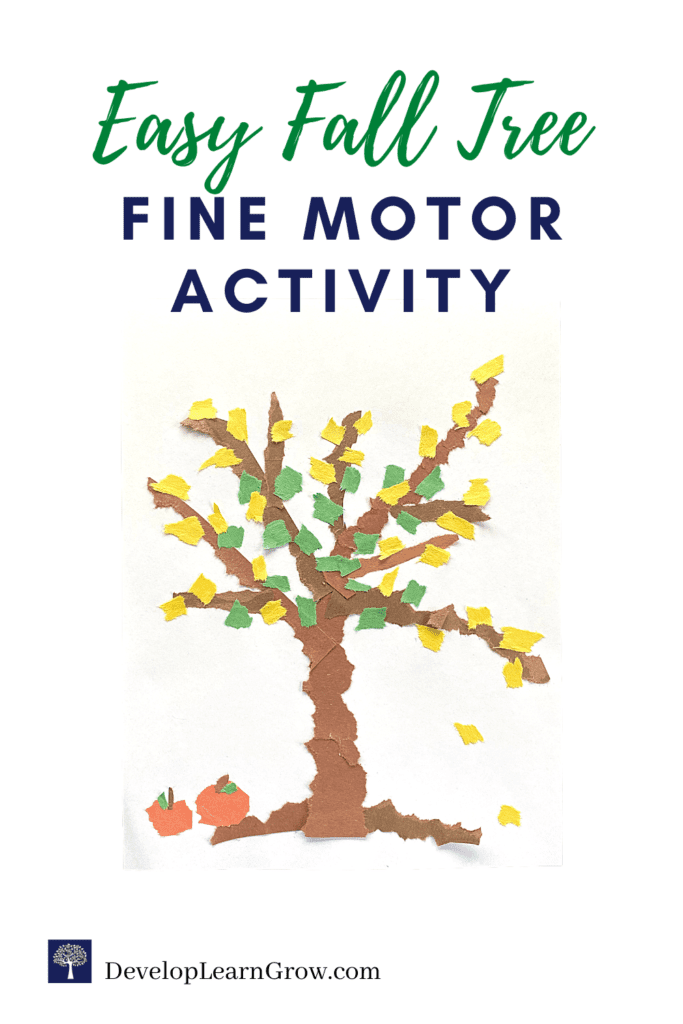
Example One: Fall Tree with Two Toned Leaves
If an outline is desired, draw a single straight line for the trunk and then add the branches. Tear paper for the tree trunk and the tree branches.
Choose colors for the leaves. Tear small leaves.
Start building the tree first from the bottom -> up. Glue the trunk and branches first. Place leaves on the tree as desired!
Add other elements to the picture’s background and foreground.
An alternative for this example using different materials could include pipe cleaners for the tree and construction paper or tissue paper for the leaves and other details. Tearing and scrunching pieces of tissue paper is also good fine motor practice.
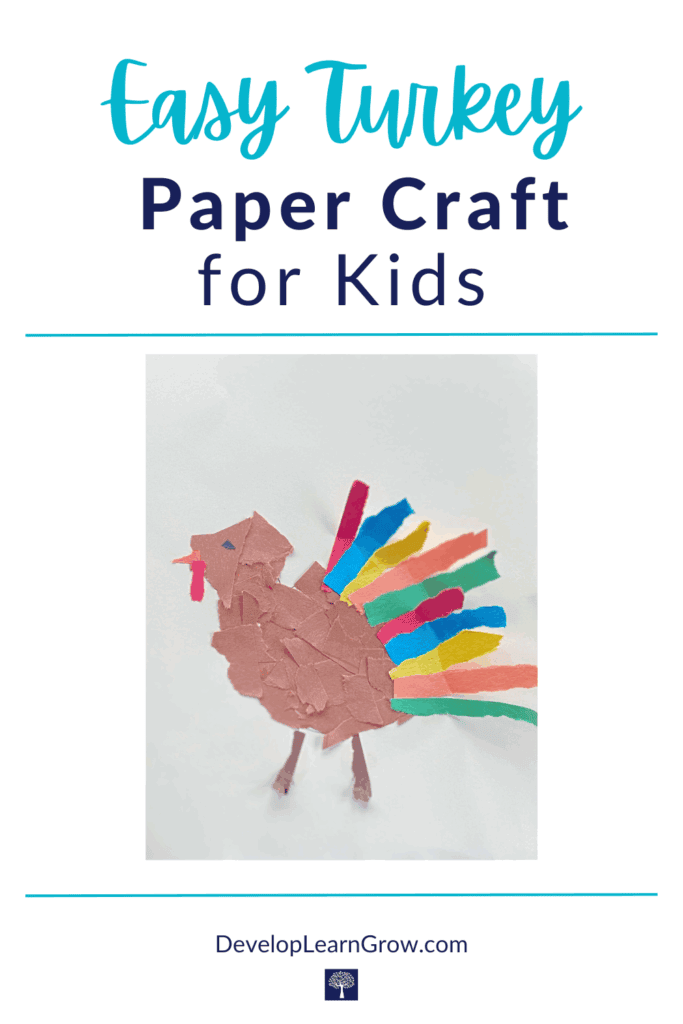
Example Two: Thanksgiving Turkey or Bird
For the outline (if needed), draw a larger circle in the center of the paper for the body.
Add a tall oval to the left, slightly overlapping the circle (see photo.)
Draw a circle to the top left of the oval for the turkey’s head.
Make straight lines down from the body for the legs and feet.
Tear paper for the body and feathers. If desired, the entire turkey can be multi-colored with smaller pieces of construction paper. (My son made this example. He chose to make a brown body and a fan of colorful feathers.)
Smaller, more detailed pieces of paper are required for the feet, beak, waddle and eye.
Glue the body, neck and head. Then add the feathers, feet, and other small details.
Depth can be added to the picture by only gluing the base of the feathers and curling the tips off the paper.
Add other elements as desired to the picture’s background and foreground. Also, you could add googly eyes to your turkey or bird.

Example Three: Simple Christmas Tree
The outline for the tree can be as simple as a large isosceles triangle. Or, you can have students draw the jagged edges of the tree.
Tear green strips of paper for the tree. Have students try to make some of the green pieces triangular in shape. Or, it would work to use more long thin pieces.
It’s easier to build the tree from the bottom -> up. Some students may prefer building from the top down.
Decorate the tree with torn pieces of paper or use pom poms from your craft or sensory bin.
Add other elements to the picture as desired!
Encourage Mindful Brain Breaks with Construction Paper Crafts, Fine Motor Activities and Art Projects
There are so many additional ways to use this simple activity. I’ve only shared examples of a few seasonal art projects.
As shown in the top photo of the blog post, you can have kids make Valentine’s cards or St. Patrick’s Day cards. Make spring pictures, Mother’s Day cards, logos or flags!
Another option is to have students create pictures to supplement learning activities. For example, kids can create a story setting or make a photo of a person they’re learning about. They can create an object or picture from a science lesson.
Torn paper can also be used for math problems or sequencing letters for spelling.
To add even more creativity, use a large sheet of paper and create a spring or summer scene, an animal, a sea creature, etc!
For more information on grasp development, fine motor hand strength, and in-hand manipulation skills, check out:
- Easy Ways to Support Pencil Grasp Development in Kids
- 107 Hand Strengthening Activities for Kids
- Dexterity in the Hands – 43 In-Hand Manipulation Activities and Games to Improve Handwriting
More Fun Fine Motor Activities:
As previously mentioned, this construction paper craft is so simple, but it’s an important skill to get kids ready for cutting. It’s an easy way for young kids to practice using both hands and to strengthen the skill fingers.
When young kids are ready to use scissors, make sure you follow the developmental sequence.
Check out the blog post How to Improve Scissor Skills PLUS Worksheets for Cutting Practice. Or head to my Teachers Pay Teachers Store for cutting worksheets.
Cutting activities are a great way to work on fine motor, bilateral coordination, and visual motor skills!
The blog post Art Projects for Kids – Support Reading, Writing and Math Skills emphasizes the importance of art projects and crafts for kids.
The skills addressed during arts and crafts support skills needed for learning. Kids can better understand positional words, position in space and practice paying attention and following directions during art.
Simple DIY Math Manipulatives for Tactile and Kinesthetic Learning shares simple ways to improve fine motor strength and dexterity during math using household items, toys and/or game pieces!
How to Make a Puffy Paint Snowman is a fun fun craft using a simple mixture! This is a fun mindful brain break for kids. I used the puffy paint to make a snowman in this post, but food coloring can be added to the mixture to make a variety of puffy paint projects.

")