
Learning proper letter formation is more important than you think! Kids need to learn to form letters properly from the start in order to prevent bad habits and avoid messy writing as they get older.
Occupational therapists can’t emphasize enough the importance of correct letter formation. Children should first learn how to form uppercase letters and numbers properly when they first begin pre-writing and printing. Then, they can focus on lowercase letters of the alphabet.
Using strategies that help develop fine motor skills are also important such as using the appropriate writing utensil. Then, teaching young children the proper motor patterns makes printing more efficient. Good letter formation is important to help prevent fatigue.
And teaching letter formation also helps prevent messy handwriting as kids get older (when they have to write smaller and faster.)
A few years ago, I was talking to a friend about her daughter’s virtual learning in kindergarten. She was so worried that her daughter wouldn’t learn to form letters and numbers correctly. Her teacher couldn’t see what she was doing and she didn’t know how to help her as a mom.
I LOVED that she recognized the importance of teaching correct letter formation for her daughter!
Why Teaching Kids to Form Letters Correctly is Important for Kids
Kids need to learn how to form letters properly in order to prevent sloppy printing and writing later on. Especially when they need to write at a faster speed.
I receive many school-based occupational therapy referrals for older students who write messy. Teachers can’t read their writing, and even the students sometimes can’t decipher their own writing. Most of these students grasped the pencil correctly and had good motor control and good visual perceptual skills. Their sensory processing abilities were also normal.
The problem: a very large majority of them used poor letter formations. At that point, nothing could be done to change it because motor memory had already been established too many years prior.
Hence why as an occupational therapist, I can’t emphasize enough the importance of taking time to TEACH and practice formation. Proper letter formation is such an important skill for young kids to learn from the start when drawing and printing begins.
Teaching Letter Formation- Tips, Strategies and Activities
When your students are learning to form letters and numbers, there are some things to keep in mind. And, there are some special tricks that will help you and your kids!
1. Check for Pre-Writing Skills
t’s important for kids to have number and letter recognition skills. They should identify capital letters, lowercase letters and numbers through various activities to help with memory.
- Children should be able to copy pre-writing strokes from a model (not imitate what another person has demonstrated for them.)
- Check for mastery of prewriting strokes and shapes: vertical straight line, horizontal straight line, a circle, an intersecting line (+), diagonal lines (slanting each direction), an X, a square and a triangle.
- Can they hold a pencil correctly with their thumb, index and middle fingers?
- Do they have all necessary pre-writing skills, fine motor skill development, and visual perceptual skills?
2. Review Position Words and Directional Terms
Before beginning writing instruction, make sure that children understand position words and directionality terms. Practice understanding these terms on and off their body.
- Top, middle, bottom
- Left, right
- Up, down
- Big, little (or tall, short)
- Clockwise, counterclockwise
3. Practice Drawing and Printing in Different Positions
My favorite position for kids to practice letter formation activities at a vertical surface. This helps them see what they’re doing and feel the movements against gravity. Then, they can better understand the directionality concepts.
- Stand at a wall or door with paper taped to it (largest piece of paper you have!)
- Use window crayons at a glass door or window.
- Stand at an easel.
- Stand at a chalkboard or a chalkboard wall.
When sitting for handwriting, it is best practice to make sure that your students are using the correct sitting posture at their desk. (In addition to sitting posture, the post gives tips on proper desk and chair size.)
If they need more core strength, check out these fun and easy 40 core stability exercises.
4. Practice first WITHOUT Writing Lines
This is the best way to start number and letter formation practice when kids are just learning… they need to focus on the correct motor patterns of each letter and not worry about the lines just yet. That skill can be addressed later.
If your school’s program comes with lined paper for learning, please have a blank, plain piece of paper as well for practicing. Or have them practice in the margins or on the back.
5. Use a Variety of Tools and Writing Utensils
Practice with various tools helps fine motor and visual motor development. And it improves motor memory. Try a variety of writing tools when first learning formation.
- Chalk, small crayons or dry erase crayons give more feedback for the hands. This helps increase motor control and motor memory when learning letter formation.
- Avoid using markers when possible – they are too slippery and don’t give adequate feedback to the hands as previously mentioned.
- If more feedback for the hands is desired, there are weighted tools or vibrating tools available. You can also use more chunky or thick writing tools.
6. Use Consistent Cues and Directional Terms
Follow your school’s handwriting program and use the verbal cues provided for each letter.
- Programs SHOULD encourage forming letters from the top-down for all tall letters (b, f, h, k, l, t) and for #’s 1, 2, 3, 4, 5, 6, 7.
- Use a top to bottom motion for short letters (i, j, m, n, p, r, u, v, w, x, y, z.)
- Teach an upward re-trace on some such as b, h, m, n, p, and r.
- Practice large counterclockwise motions and directions for letters with curves (a, c, d, g, o, q, and the top part of ‘s’) as well as numbers 8 and 9. All of these start at the top and move in a counterclockwise direction . This is an important skill to support efficiency when writing. (Practice large counterclockwise circles in the air to get their shoulder and arm used to moving in that direction.)
- Teach forming ‘e’ in one motion without picking up the pencil.
- When forming letters like ‘a’ help kids learn to use a continuous motion to help prevent segmentation of letters which can make them hard to read. For example, making a circle and then a line for the ‘a’ can end up looking like an ‘o’ and an ‘i’ when kids start to write faster.
7. Model and Teach Correct Letter Formation
- Show children how to form the letter first (while using the appropriate verbal cues.)
- Then, practice sky writing (air writing.) They point their finger to “draw” the letter in the air. For kids, using the shoulder muscles activates a larger area of the brain to help improve motor memory.
- And as stated previously, practice on plain paper without lines.
- Additionally, I personally avoid having children trace letters when first learning formation. They tend to just cover up what they see and often don’t think about the correct formation. Tracing is a great warm-up activity on anything except letters and numbers. This article from the learning professor (Dr. Jenni Jacobs) supports my thoughts and further explains this!
[Affiliate links are used below for your convenience. There’s no additional cost for you. If you choose to click on an Amazon link and make a purchase, Develop Learn Grow may earn a small commission.]
8. Use a Multisensory Approach When Teaching Correct Letter Formation
- Write in a sand or salt tray or shaving cream using the finger.
- Create a sensory bag (place gel, paint, or any condiment or puree into a Ziploc bag.) Place it on the table or *tape to a vertical surface such as a window or glass door!
- Practice with chalk on a chalkboard. Trace with a small, wet sponge (1/2 inch.)
- Put plain paper over a sheet of sandpaper or over a bumpy craft screen. Use a pencil to write on the sandpaper or a crayon to write on the screen.
- MY FAVORITE trick: have the children practice on plain paper with their eyes closed. This is the best way to check reinforce memory of formation. I make it a challenge to “see if your hand and brain can remember how to make the letter!”
Check out 21 Kindergarten and Preschool Writing Activities that Use Sensory Input for more Ideas.
9. How Often Should Kids Practice Printing?
Kids should practice letter and number formation daily.
- Only 5-10 minutes of practice per day, no more than 15 minutes. The focus should only be on one or two letters at a time.
- You can check the letter learned during a previous day, before moving onto a new one.
A Simplified Handwriting Program to Teach Proper Formation
If your school doesn’t have a designated handwriting program, I highly recommend Handwriting Without Tears (HWT.) There are handwriting books for each level. It’s a program used frequently by pediatric occupational therapists.
If your school uses another handwriting program, the HWT supplies listed below (special pencils, crayons, etc) can be used to supplement your program. They’re a great way to add multisensory activities as part of the learning process.
The program was developed by an occupational therapist, Jan Olsen. Over the years, her handwriting program has evolved into a company, Learning Without Tears.
Jan Olsen’s Handwriting Without Tears program offers a fun and simplified approach to learning how to form letters and numbers. Booklets and hands-on activities and manipulatives can be found on Amazon (links provided below for your convenience.)
Handwriting Without Tears Practice Books
The green My First School Book can be used in preschool or for kiddos who need additional fine motor practice. It includes pre-readiness tasks such as grasping, coloring, drawing, counting, numbers and shapes.
The purple Kick Start Kindergarten Book covers capital and lowercase letters. It bridges the Pre-K program. Use this for transitional kindergarten, Jr. kindergarten, or second year pre-K.
Letters and Numbers for Me Book is the orange book used for Kindergarten printing (student edition.)
The yellow My Printing Book is for first grade. Groups of the books can be purchased on Amazon for a discount.

Handwriting Without Tears Tools and Supplies (Available on Amazon)
If you don’t need the Handwriting Without Tears books, there are helpful fine motor skills supplies for little hands learning to print!
My favorite Handwriting Without Tears tools are included in the beginner kit which can be found here on Amazon.
In the kit, the chalkboard provides great feedback for the hands. The small sponge erasers help with grasp development, visual motor integration, and motor control.
HWT pencils are appropriate for small hands. The flip crayons are excellent for improving in-hand manipulation / finger dexterity. (These each can be found separately from the kit.)
I have used and loved all of these supplies (and still have them in my supply stash!) There are also packs of specialized double line paper for kiddos who have trouble with three-lined paper.
Jan Olsen created some great songs that accompany the writing program. The entire CD of songs can be found for free on this YouTube link!
She also offers books for learning cursive writing. I’ve also used this for many kiddos who needed a simplified motor approach.
Have fun choosing which handwriting program is best for you to use. But please just make learning formation a priority. It will prevent messy writing later for the kiddos.
More Fine Motor and Occupational Therapy Tips for Writing
- Development of Pencil Grasp, How to Promote a Functional Grasp with 5 Types of Activities – this post also shows images of pencil grasp development.
- OT Tips for Pre-Writing Skills & Fine Motor Skill Development – includes an image of the shapes kids need to draw before starting to print letters and numbers.
- Art Projects & Crafts for Kids – A Great Way to Support Learning and Development – several fun, relaxing and creative activities that support visual motor skills needed for printing and writing.
- An Easy Visual Motor Activity Using Magnets – fun activity to work on hand awareness, grasping, and coordination for writing – minimal DIY materials, improves motor skills, and provides a fun way to practice the alphabet, spelling, and more!
For Even More Info – Try This Exercise Program for Posture, Core Stability, Fine Motor Skills, Writing and Attention to Help Improve School Function
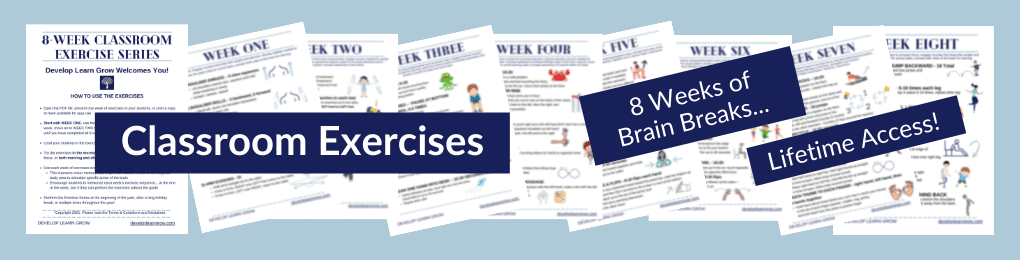
Use these specific occupational therapy exercises to improve:
Attention… focus… core stability… crossing midline… sensory processing… visual development… & more… Click for more info!

")